Summary
Instagram offers several photo editing settings, including Brightness, Contrast, Saturation, Warmth, Highlights, Shadows, Vignette, and Structure. The key is to experiment with these settings to find the best combination for your photo and learn what manipulating each setting does to the look of the photo so you'll have a foundation to start with when you move into more robust photo editing software such as Lightroom.
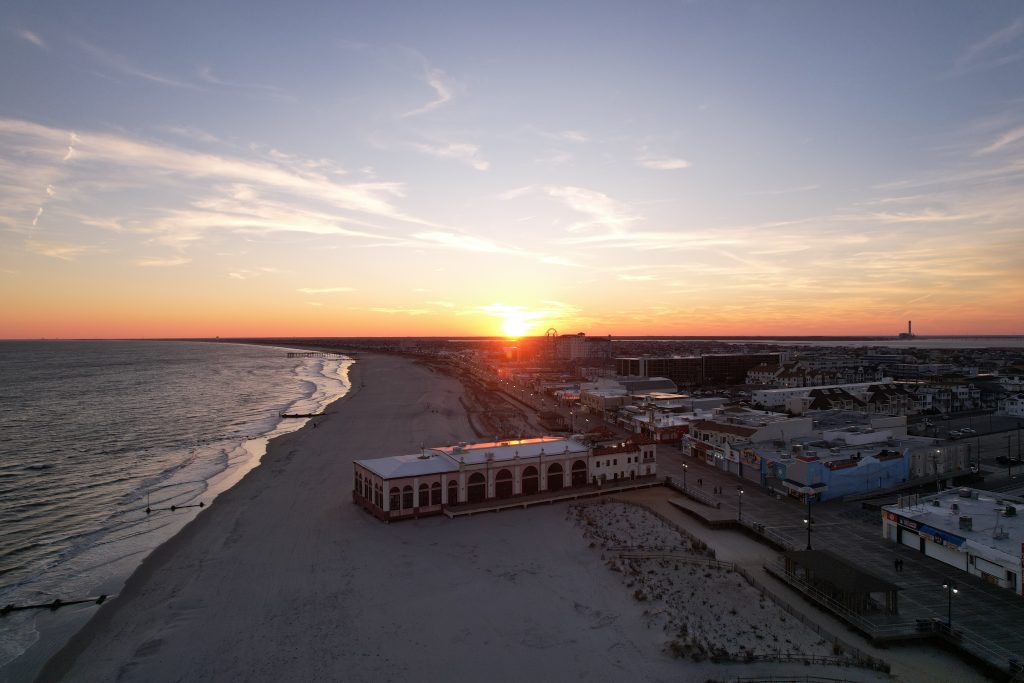
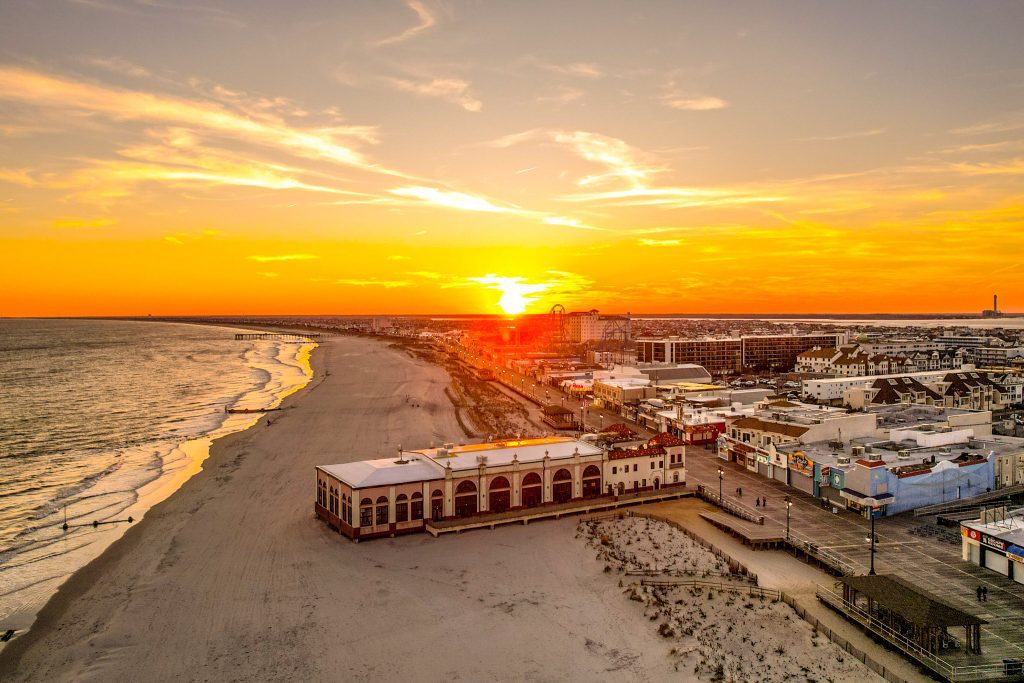
We LOVE capturing drone photos from the perspective of our drone. But what comes through the lens never seems to have the same visual impact as what was seen and felt in that moment. Whether it’s a vibrant sunset or even getting a cool gloomy look on a cloudy day, we rely on editing our drone photos to help the viewer feel more of the emotion we felt seeing that moment in real time.
Our day-to-day photo editing takes place in Adobe Lightroom, but you don’t need to have a paid editor like Lightroom to make your own great photo edits!
Instagram has become one of the most popular social media platforms where people share their daily lives, including photos.
Over the years, Instagram has added many photo editing features, making it easy for users to enhance their photos before sharing them with the world. This makes Instagram the ideal place to start improving the look of your drone photos for free before investing in professional editing software.
*Note that the purpose of learning the following features is to allow you to dial in your own look and NOT rely on the preset filters available. Learning how to manipulate your photos using these manual settings will give you the foundation needed for taking your photos to the next level in editing software such as Lightroom.
Here are some of the available photo editing settings on Instagram and the impact each change has on the photo:
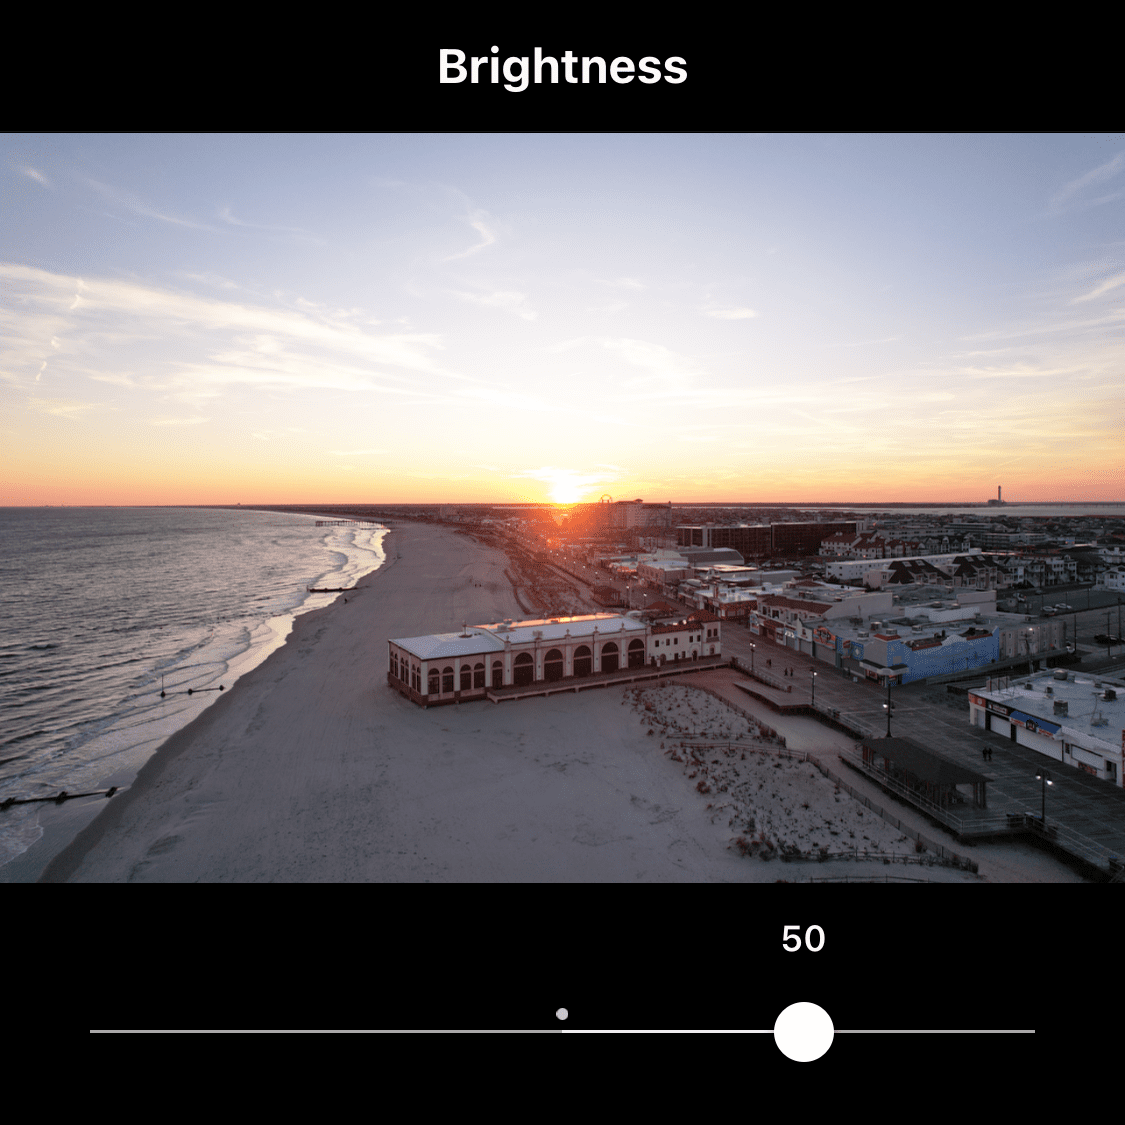
Brightness Photo Edit:
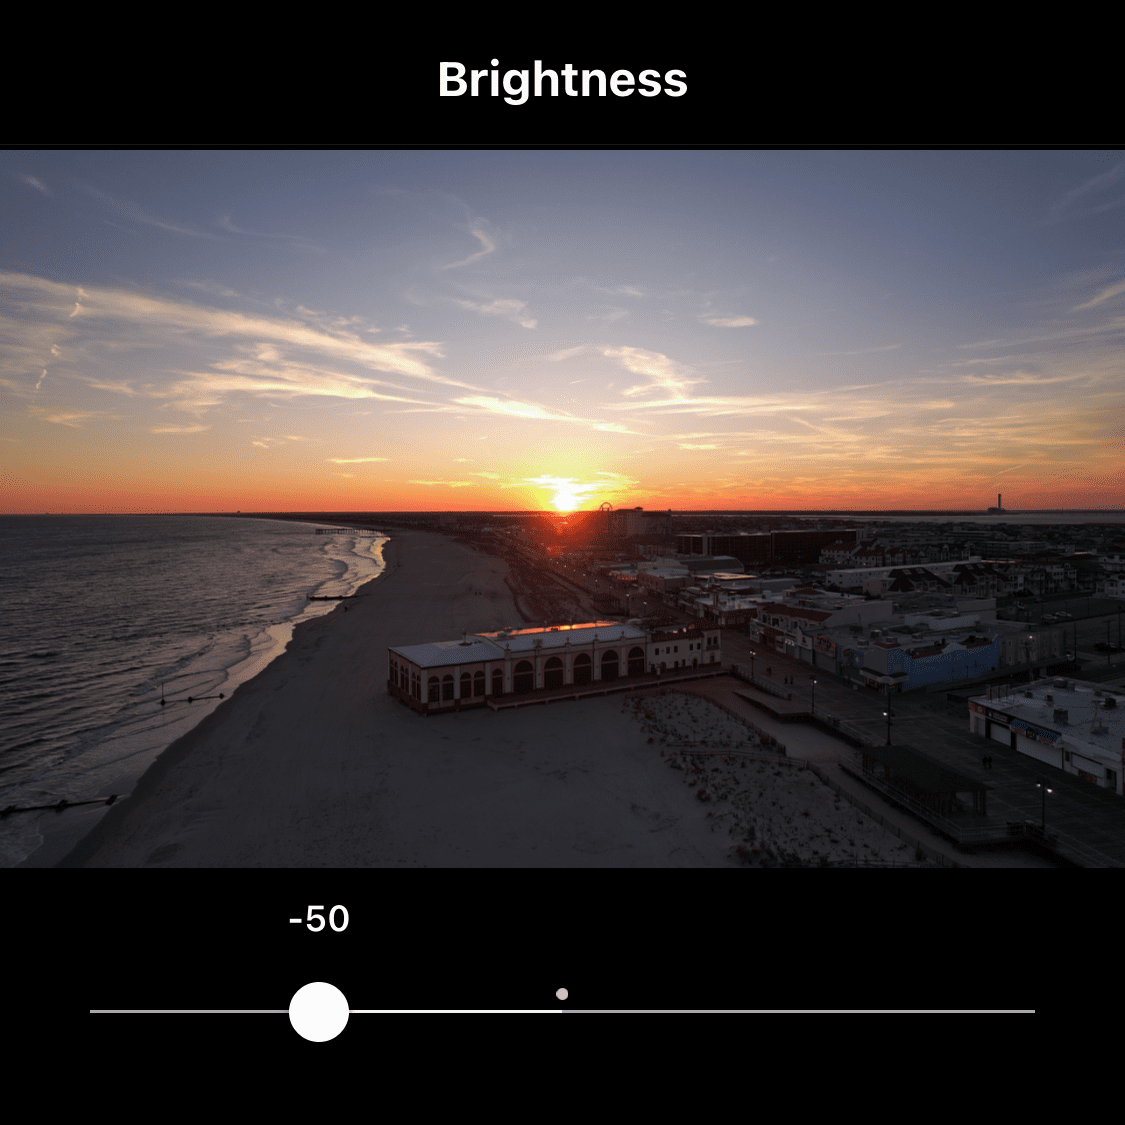
Brightness: This setting adjusts the overall brightness of your photo. Increasing the brightness will make your photo look more vibrant and cheerful while decreasing it will create a moody and darker feel.
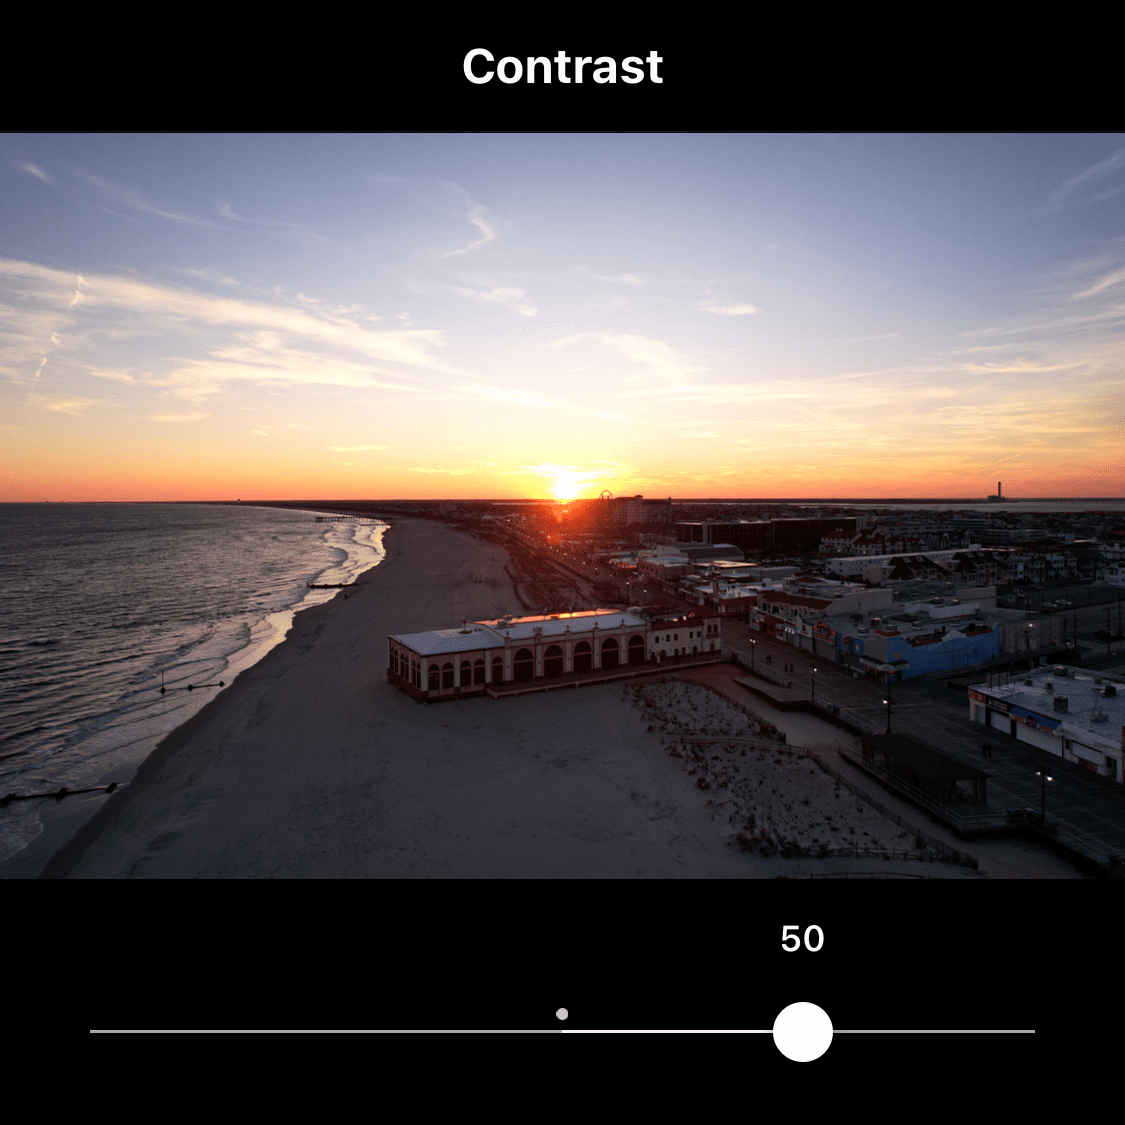
Contrast Photo Edit:
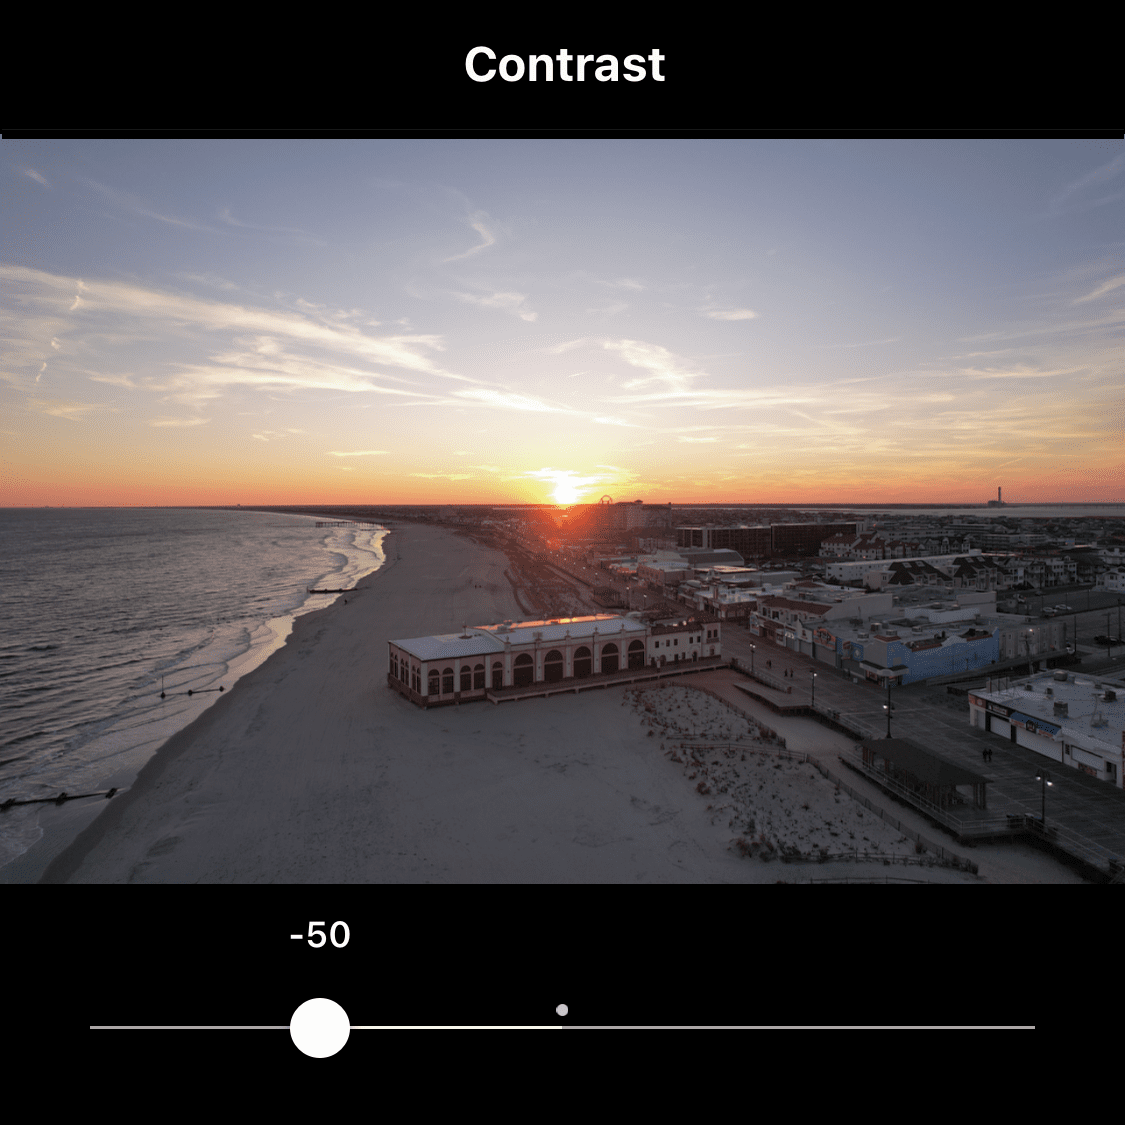
Contrast: This setting adjusts the difference between the dark and light parts of your photo. Increasing the contrast will make the photo look more defined while decreasing it will make it look washed out.
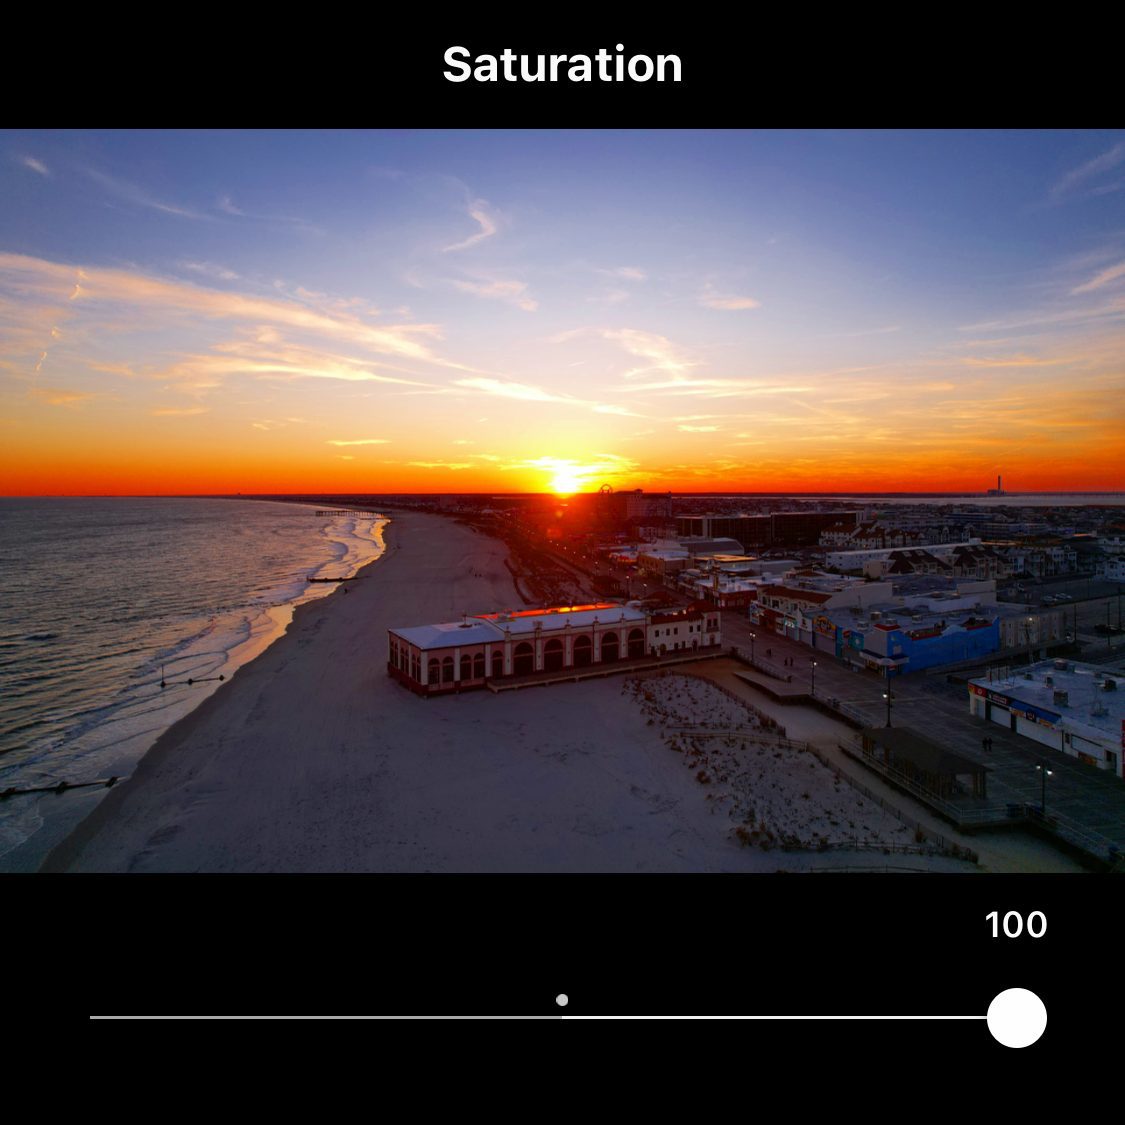
Saturation Photo Edit:
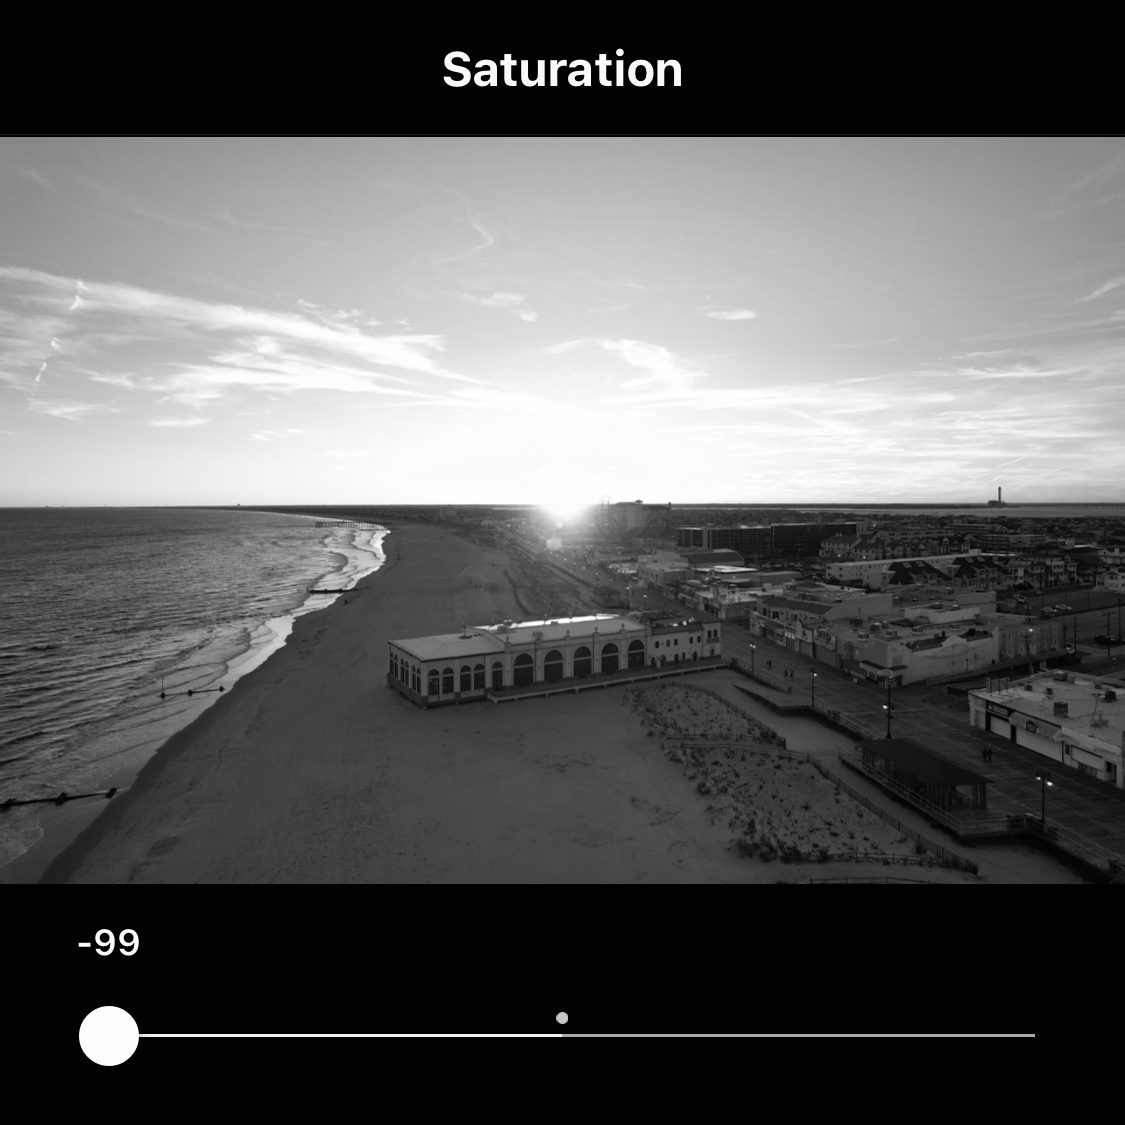
Saturation: This setting controls the intensity of the colors in your photo. Increasing the saturation will make the colors more vibrant while decreasing it will make them appear dull and faded.
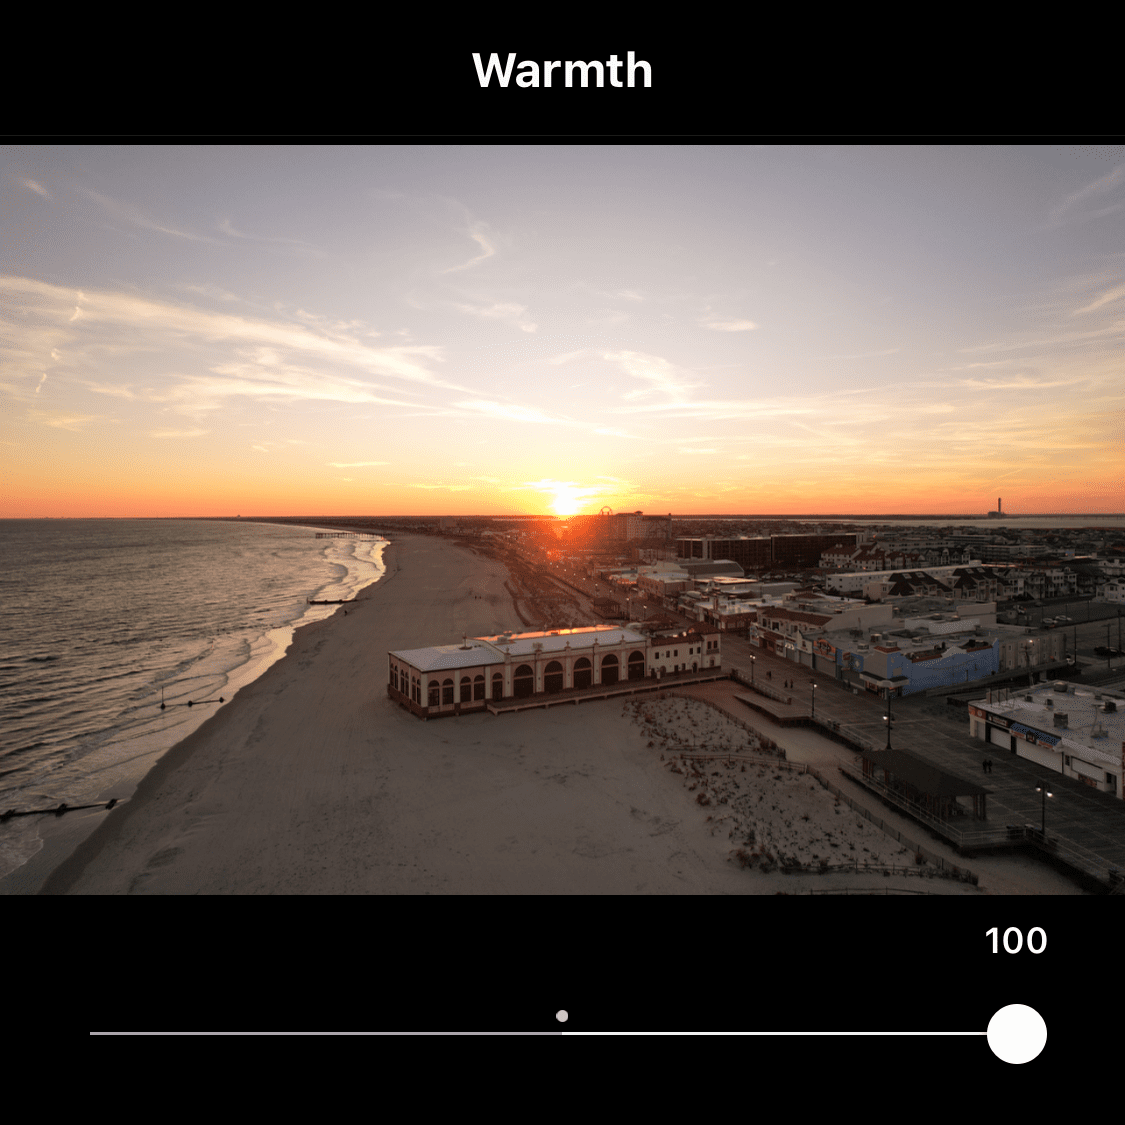
Warmth Photo Edit:
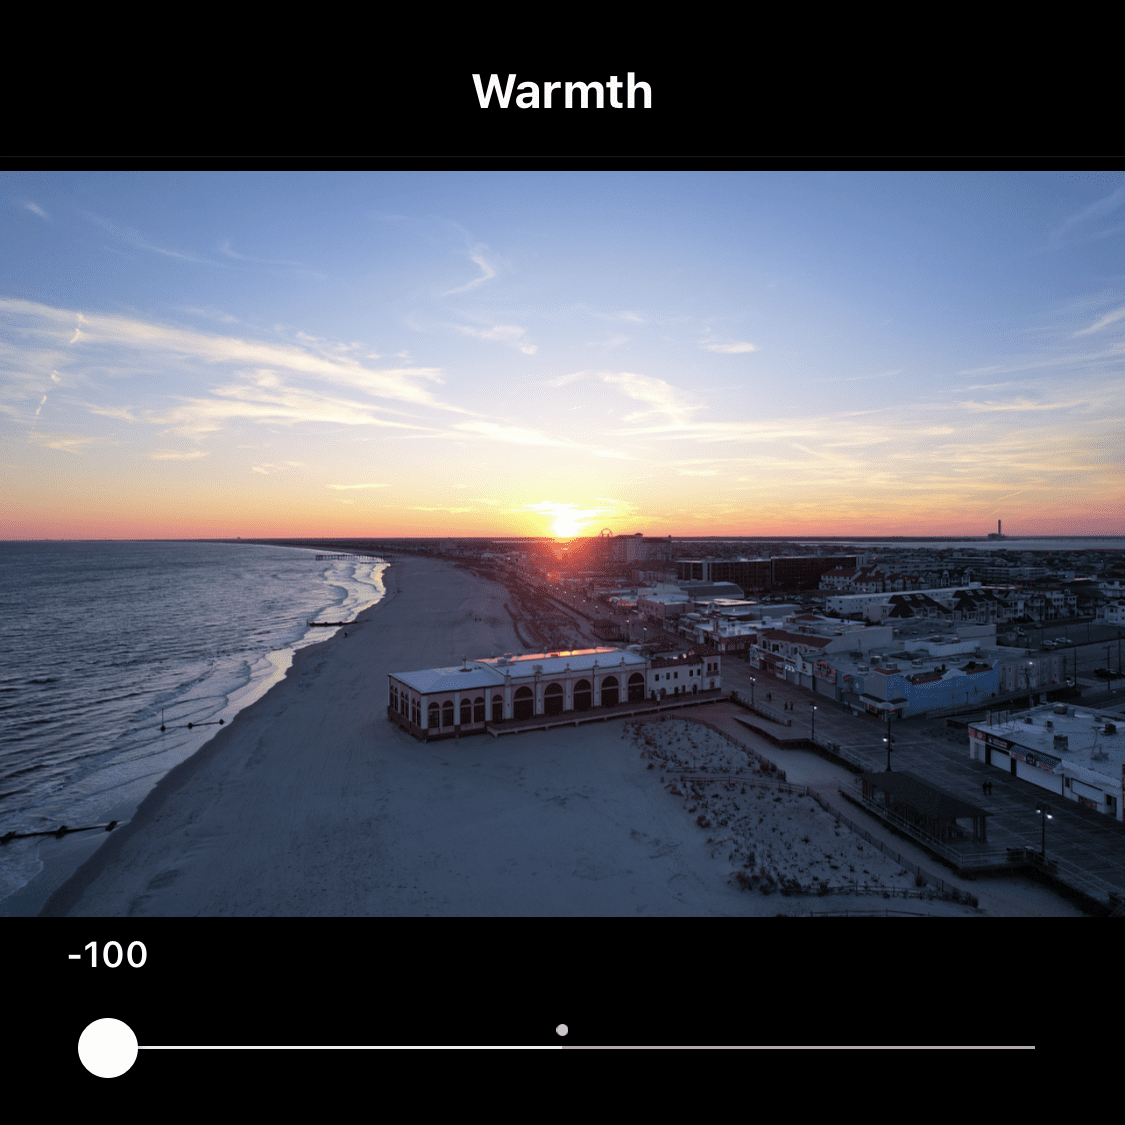
Warmth: This setting adjusts the warmth or coolness of the photo. Increasing the warmth will make the photo appear more yellow or orange while decreasing it will make it appear more blue or green.
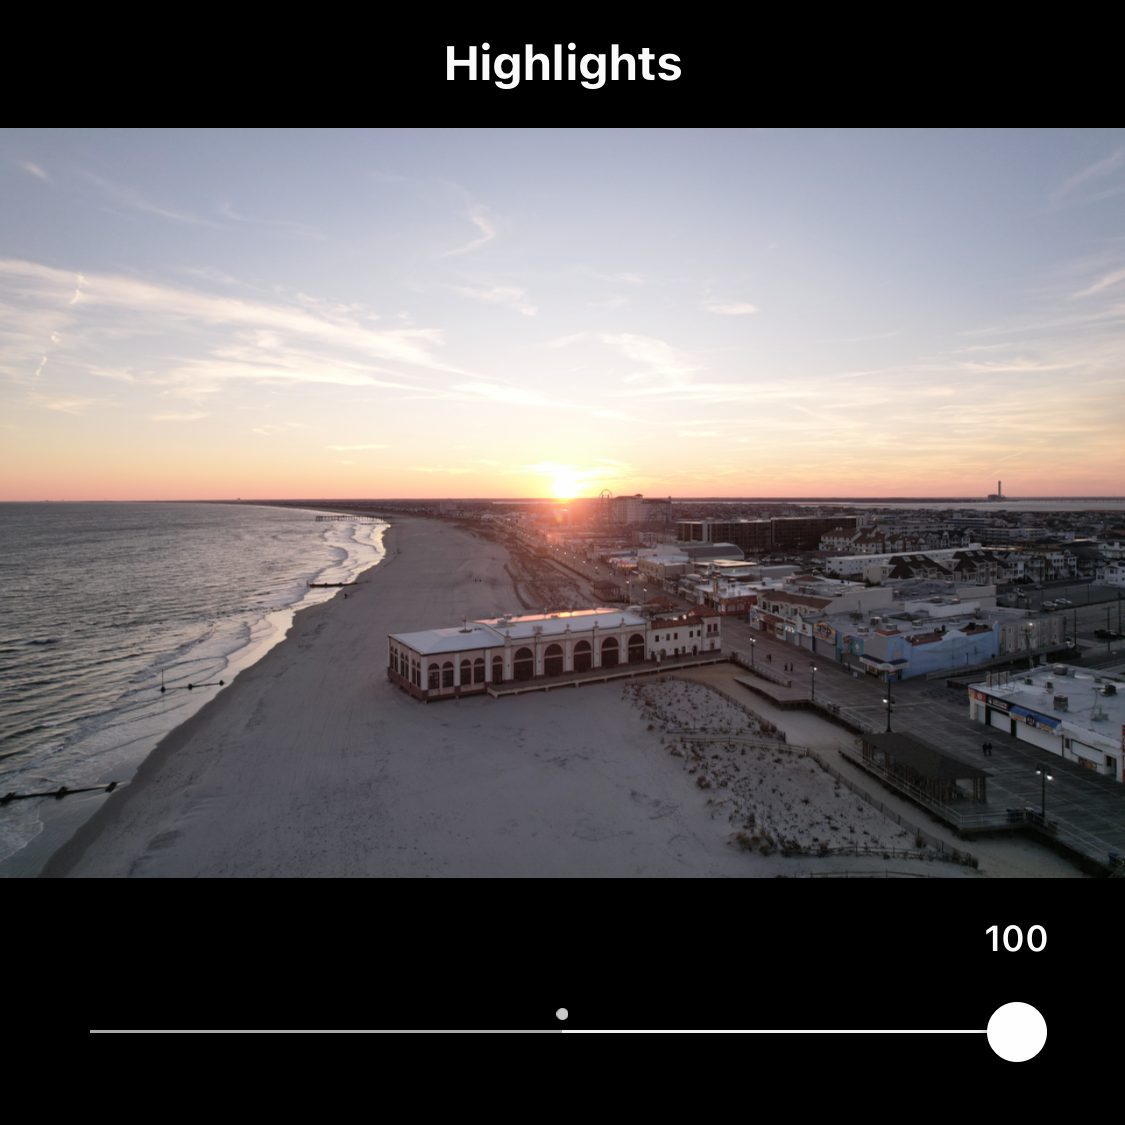
Highlights Photo Edit:
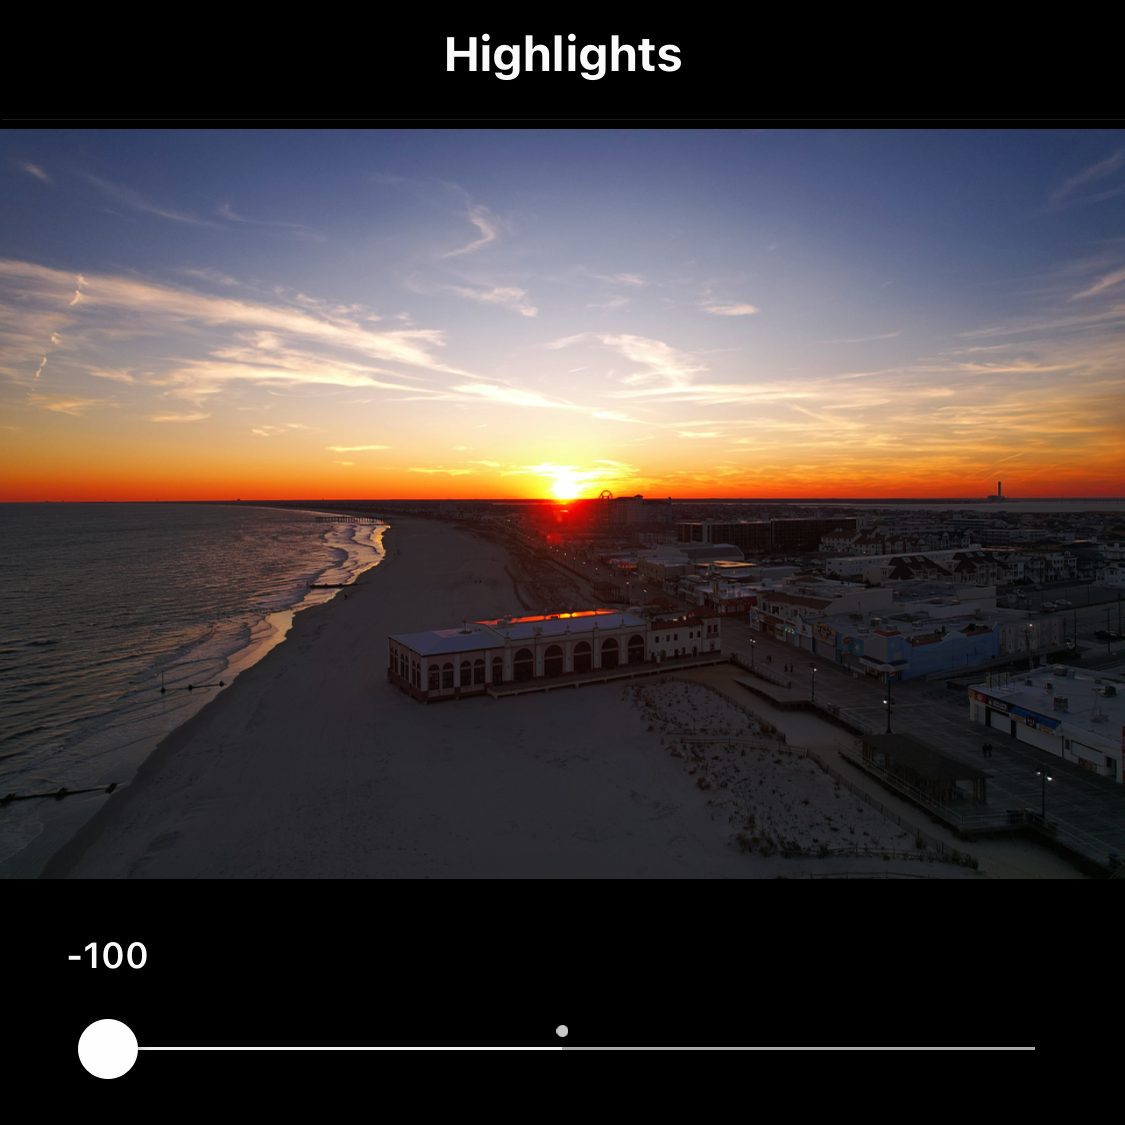
Highlights: This setting adjusts the brightness of the brightest parts of the photo. Increasing the highlights will make them brighter and more prominent while decreasing them will make them less noticeable.
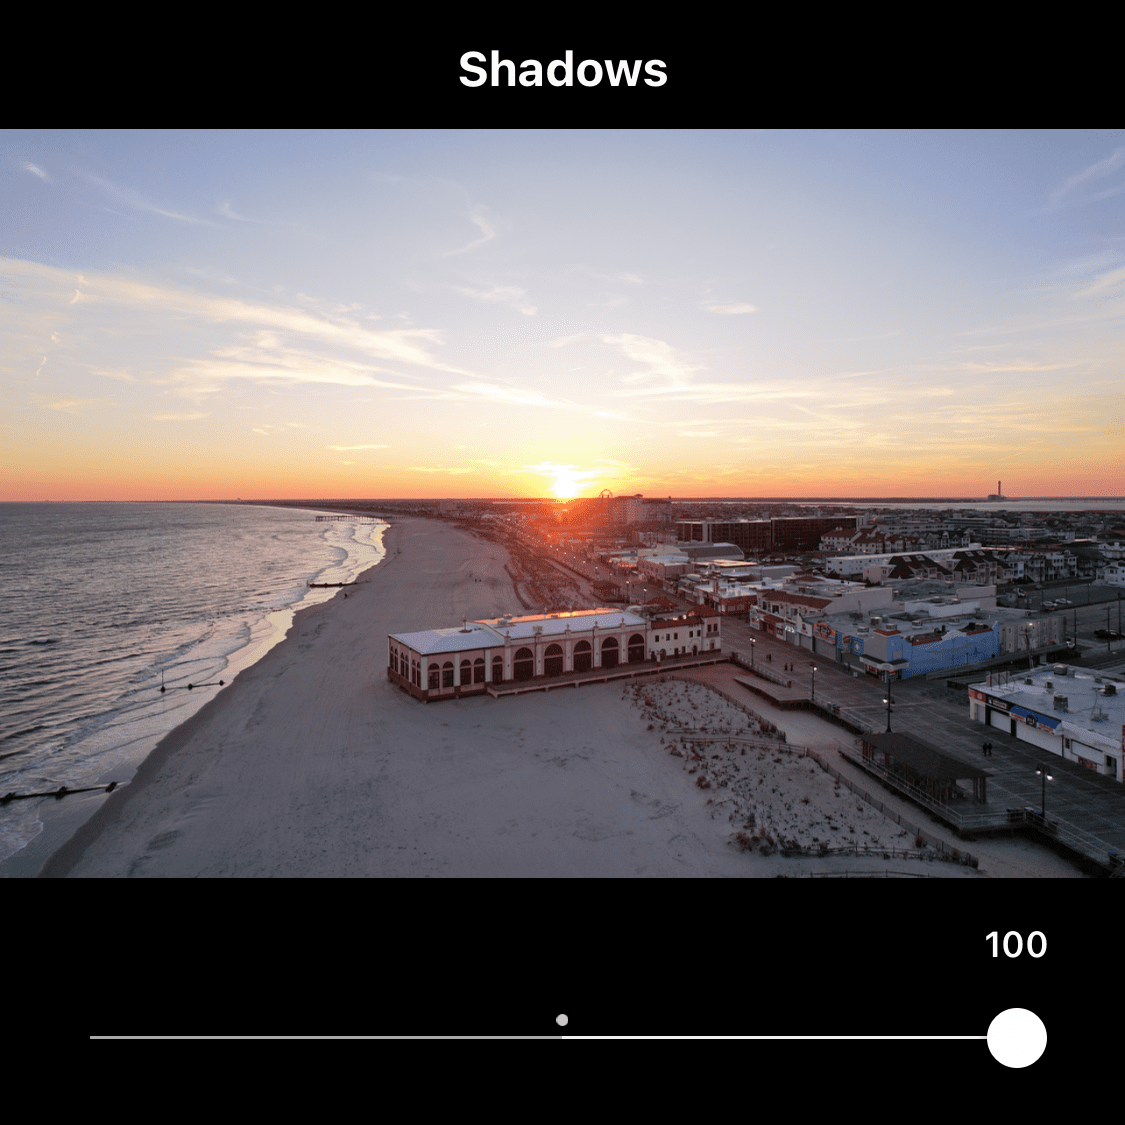
Shadows Photo Edit:
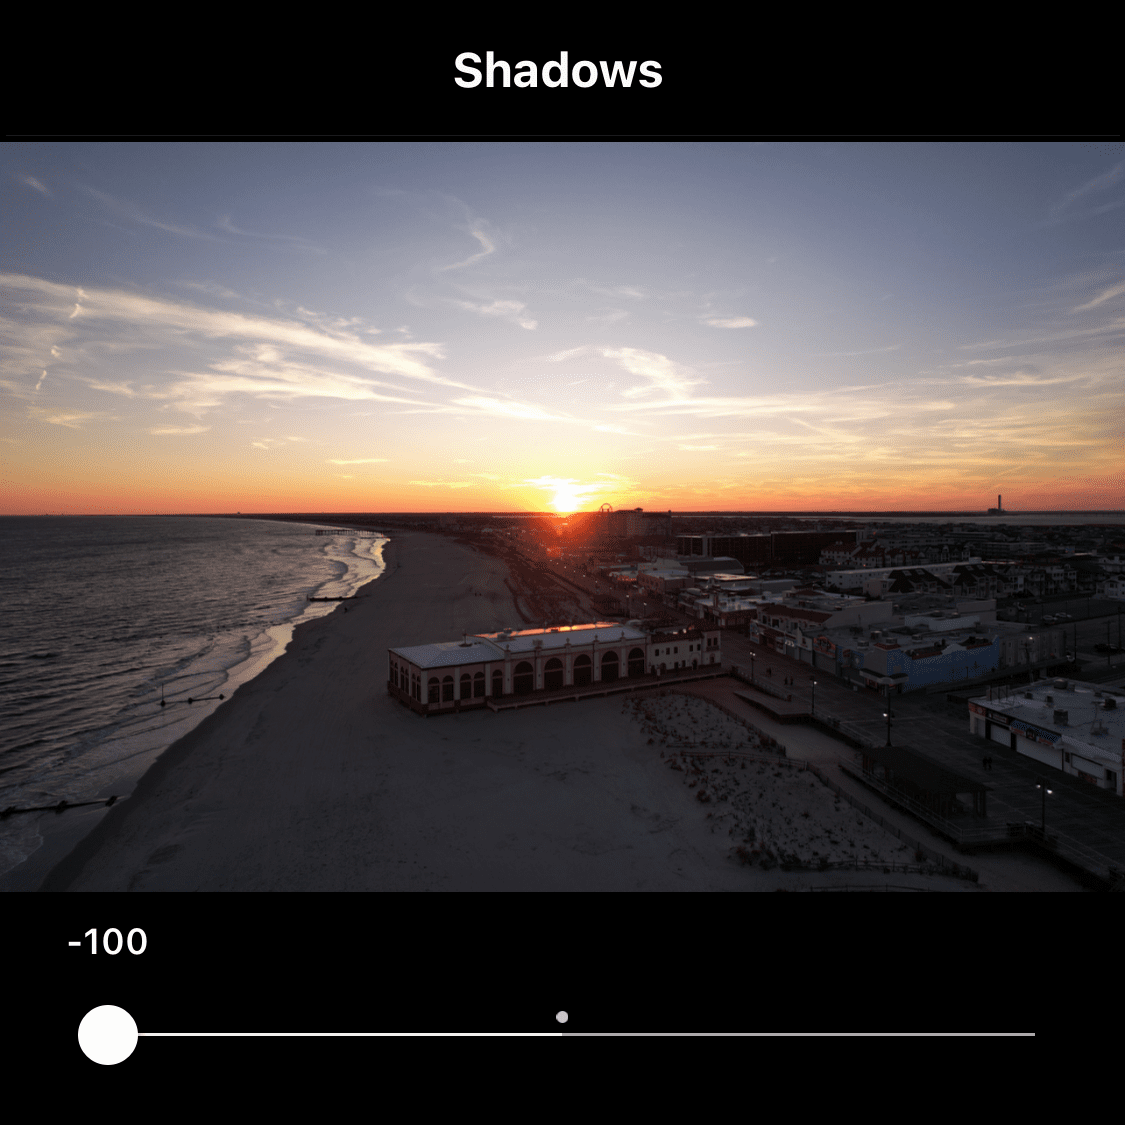
Shadows: This setting adjusts the brightness of the darkest parts of the photo. Increasing the shadows will make them brighter and more prominent while decreasing them will make them less noticeable.
Vignette Photo Edit:
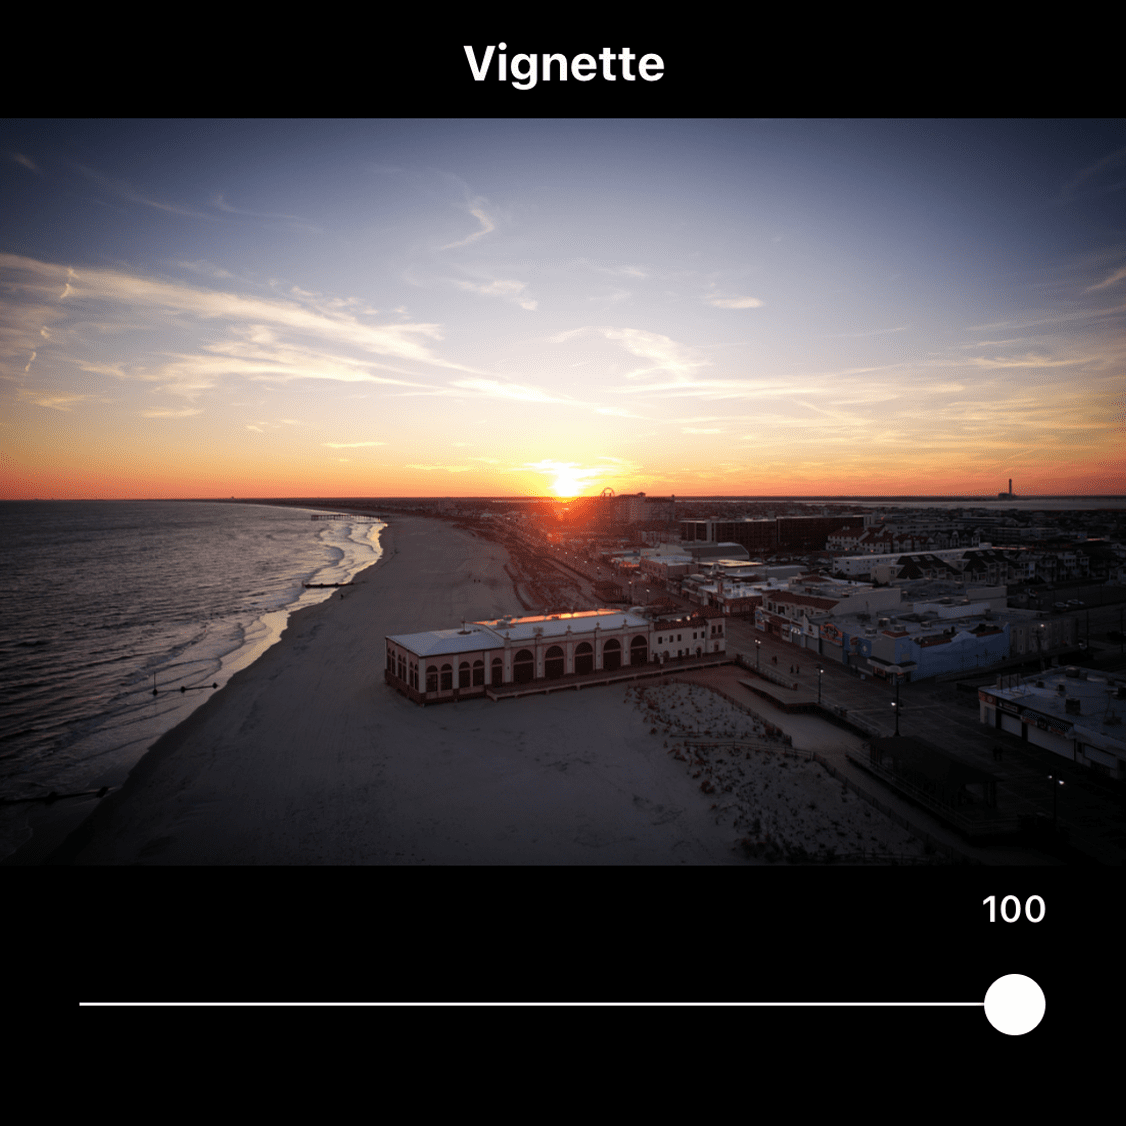
Vignette: This setting darkens the edges of the photo, creating a vignette effect. This can draw attention to the center of the photo and create a more dramatic effect.
Structure Photo Edit:
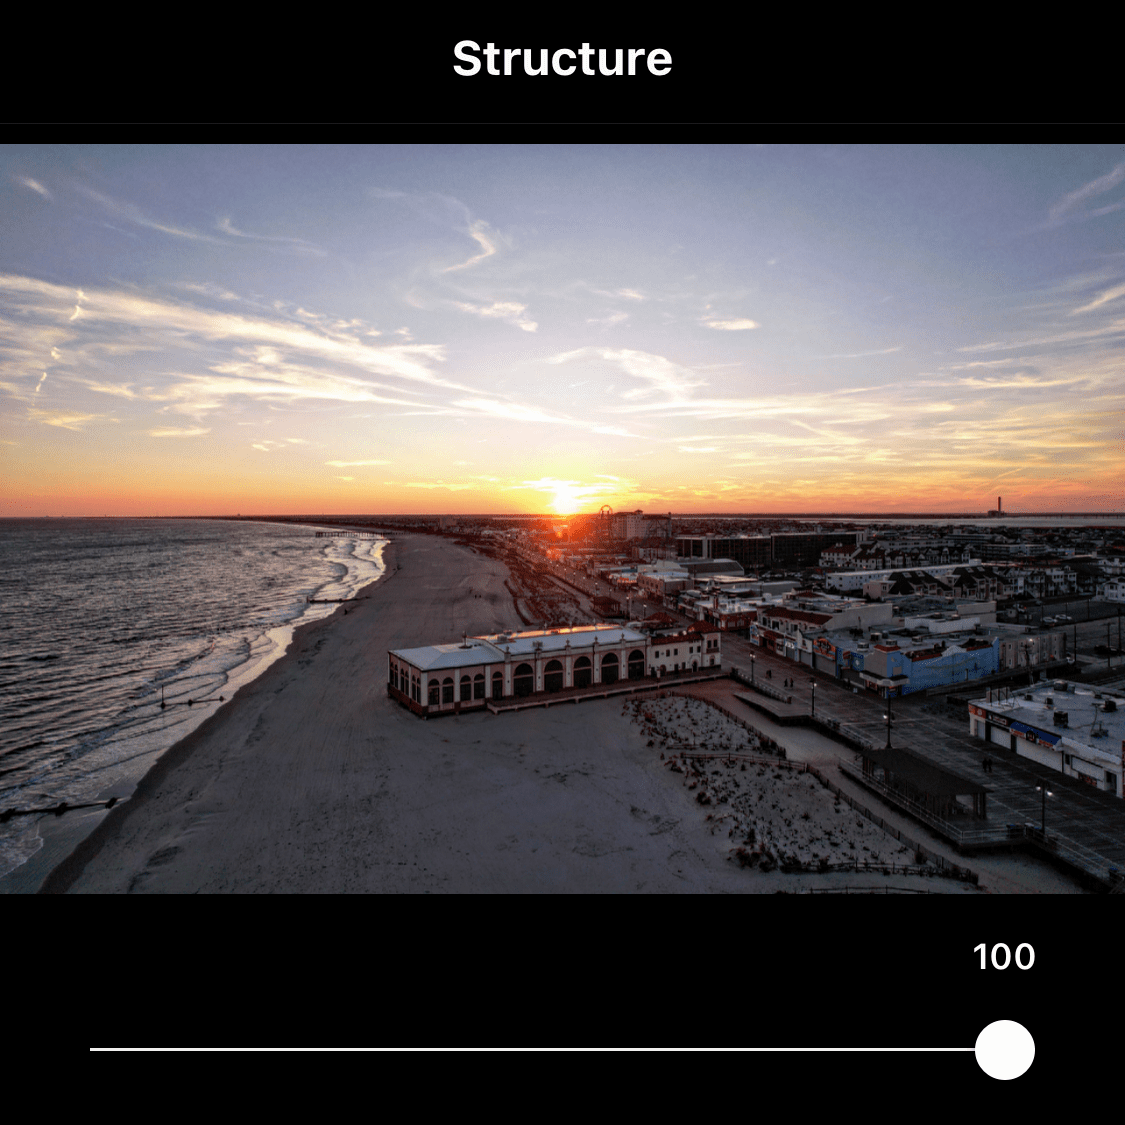
Structure: Similar to the Clarity setting in other photo editing software, the Structure setting enhances the details in the photo, making them appear sharper and more defined. Increasing the Structure setting can give your photos a more 3D-like appearance and make them stand out more.
*One feature not shown above is Tilt-Shift.
Tilt-Shift blurs the edges of the photo, creating a shallow depth of field effect. This can make the subject of the photo stand out and create a more artistic look. But use this setting tastefully if at all. One thing we see a lot is the overuse of this feature and/or unnatural use of it. We recommend not using it until you become a little more familiar with general photo editing and you understand when and how this effect should be used.
These are just a few of the photo editing settings available on Instagram. By experimenting with these settings and finding the right combination for your photos, you can create high-quality edits that stand out on the platform. Happy editing!
Check out some of our Drone Photography on our Drone Services page.